Showing posts with label Needle Arts. Show all posts

Tuesday, February 1, 2011


Part of giving handknits to kids is detaching from their fate. Do I want it to be used and loved, or do I want it to sit in a drawer? If the former, well then: I have to accept that it won't stay pristine.

I have a sort of mental rule, though, that I want them to wear the gift for at least as many hours as I spent making it before I can consign it to its uncertain future.
I can't quite bring myself to think about the ratio of work time to wearing time for this gift. It's not a pretty ratio...

I didn't get to the Office of Readings until after they left for school, and it felt like a nudge from heaven to see that today was the feast of St. John Bosco. (He is best known for his work with orphaned and abandoned boys.) Here's a snippet from today's second reading:
They are our sons, and so in correcting their mistakes we must lay aside all anger and restrain it so firmly that it is extinguished entirely. There must be no hostility in our minds, no contempt in our eyes, no insult on our lips. We must use mercy for the present and have hope for the future, as is fitting for true fathers who are eager for real correction and improvement.

My initial reaction was to feel sorry for myself: all that work, and poof! -- it's gone. Then I thought about how many gifts God has given me that I have failed to appreciate or even keep track of. I think I will swing by the school with a little note for my sad boy: "You are more important than the mittens."


[full post at Light and Momentary]

Image source

Thursday, November 11, 2010

There's still time

to make this fashion statement before your annual family Thanksgiving gathering.

Or better yet, give it as a hostess gift. You'll be a popular guest!

Found here. And I'd like to note that the internet is an amusing place when you've had too much coffee and can't sleep at 3 a.m. Not that I'd know...

Thursday, August 26, 2010

Today's Word

The recent post at NLM on the Watts Book of English Church Embroidery is interesting enough, but stay on their site a little longer and drool over the amazing fabrics and vestments. Even the banners are impressive!

And as long as we have such a perfect visual aide, let's move into today's word:

Cope
The vestment worn by clergy at Benediction, processions, and solemn celebrations of the Liturgy of the Hours. A cope is a floor length garment and is fastened around the neck by a clasp. A hood shaped like a shield is usually on the back of the cope.

Tuesday, August 3, 2010

Swatching it up


On Friday, Therese and I are going to the biggest button store in New England. We are pretty excited.

Whenever possible, I like to purchase buttons after a project is finished. For one thing, you have a better idea of how many buttons you'll need. But being an urban, pedestrian Church Lady, I don't have the option of lugging several almost finished projects with me to the button store.

Instead, I've come upon a technique that gets extra mileage out of your gauge swatch. After you've worked the requisite number of rows, knit a few rows in garter stitch, then, while knitting in the button band stitch pattern, work a button hole every few rows. You'll get a sense of how much the buttonhole stretches and what size button you should purchase. You can also experiment with different kinds of buttonholes to see what works best with the fiber. And on a lighter note, all you'll have to carry is the gauge swatch.

Image source

Thursday, July 15, 2010

Travel plans to Belgium?


I was just over at NLM reading about the Praying with Needle and Thread vestment exhibit at Tongerlo Abbey in Belgium. The title of this exhibit alone is enough to make me want to go! Spend a few minutes there today marveling at the incredible details of these beautiful works. You'll be glad you did!

Thursday, June 24, 2010

The ways of her household

From Jamie:

I didn't know how much pleasure I would get out of that machine over the next fifteen years. My husband has never understood my itch to make clothing. Sewing rompers, knitting socks -- he thinks it's a little like digging a well in your backyard and carrying the water inside even though the municipal water is perfectly safe and there for the pouring. It strikes some Proverbs 31 chord in me, though. It reminds me of the women in other parts of the world who have made most of the clothes I wear, out of necessity and not out of spare-time privilege. It draws on my little store of hard-won knowledge, ferreted out through hours of deciphering pattern-speak -- hours in which an armhole facing became a series of sensible steps and not a mystery akin to transmission rebuilding.

These days making clothing is an underappreciated art. When I pin a dart or turn a sock heel I wonder about the women who first figured those things out, the tricks for accommodating their loved ones' angles and curves. The clothes we make for our children are born of our hands' skill and our hearts' tenderness. "Here," they say, "it's a tough world out there. Here is something to keep you comfortable, protected." No matter how soft the fabric, they look to me like armor.

[full post at Light and Momentary]

Image source

Saturday, June 12, 2010

Lucy the Chair Lady

"[Rose] had also begged from an old aunt at Beverley Farms a couple droll little armchairs in white painted wood with covers of antique needlework. One had 'Chit' embroidered on the middle of its cushion, the other 'Chat.' These stood suggestively at the corners of the hearth.

"'Now Katy, said Rose, seating herself in 'Chit', pull up 'Chat' and let us begin.'"
[Susan Coolidge, What Katy Did Next]

You really can get just about everything here at Church Ladies- recently, there's been everything from spirituality to college football to needlework to great art to recipes. What can we say? We're women of many interests.

Here follows a double endorsement- both for the Katy books and for taking a stab at upholstery. Let's start with the former.

The Katy books chronicle the life of the Carr family in 1860s America. It is a lovely series about a family living out Christian values and a beautiful testimony to the friendship between siblings. Although the fictional Katy Carr is contemporary with Laura Ingalls Wilder, she has a very life. Katy grows up in a well established small Midwestern town, goes to boarding school out East, and travels to Europe; her siblings are a part of the great expansion of the West. I think the Katy books would make for delightful family reading- they are wholesome without being moralizing, like most literature branded Christian fiction.

Now for the heavier topic. Yours truly has a big heart.... especially for lonely chairs. It started innocently enough. I needed an extra chair for living room. Enter a nice chair from the consignment store. Then came the Holy Rosary parish rummage sale. It took 3 trips with my compact car, but I hauled 5 hand-carved cherry chairs home... for the grand total of $25. Another one of my collection, found on a street corner in a college town, is the most historic. When re-covering it, I discovered a manufacturing sticker dating the chair's construction to Matoon, IL, 1912 and freighted to Boise. I can only image the stories it could tell. And over Memorial Day weekend this year, I found a solid cherry captain's chair on my way to the market.

Changing the seat cover on a chair is one of the easiest skills. My mother taught me how when I was 5. All you need is a screwdriver and a staple gun (with staples at least 1/2" long).

If you are starting with a reclaimed chair, wash the wooden portion with oil soap. Dry it, then unscrew the pad. This is also a good time to rub the wooden frame with Old English scratch cover, in light or dark wood as appropriate.

Examine the condition of the chair cushion. If it's intact and clean, you can cover right over it. However, if the cover is in poor condition or has holes with padding exposed, you'll need to re-cover it with vinyl (more later).

Now comes the fun part, the trip to the fabric store. Don't panic- upholstery fabric can be expensive, but 1/2 a yard will cover 2 chairs, if lining up a motif isn't necessary, and some of the chains often have 50% off sales on decorator fabric. Also, check out the clearance/remnant section. Apparel or quilting fabric alone really isn't strong enough for upholstery, but if you find a print that's absolutely perfect, you can fuse it to a heavy-weight fabric, although it will be more prone to stains, since it isn't scotch-guarded like upholstery fabrics. If the original chair pad is a bright color or in poor condition, you will also need some lightweight vinyl in the same quantities as the decorative material.

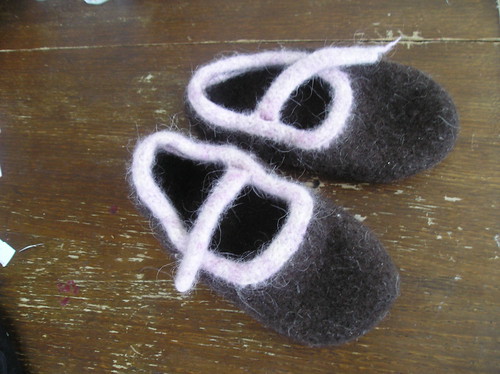
If you are a handy needle-woman, you might be interested in embroidering or knitting a cover. Napa Needlepoint has some helpful guidelines for material & design selection for embroidery; here is a delightful knitted seat.

Re-covering the seat is as easy as can be. You use the same technique whether you are starting with vinyl or decorative fabric. Cut your fabric into a rectangle about 6-8" bigger than the pad, with the motife located as desired. Put the chair pad on the ground face up, then use a few straight pins to put the fabric in place. Flip it over, and pull a side taught, then staple in place about 1" from the edge, and again 3" from the edge. Repeat all the way around, taking care at the corners, then trim the excess. Screw the pad back in place, remove the pins, and you're done!

Tuesday, May 25, 2010

Talking Sewing Machines


Margaret Mary, Therese, and I had recently discussed the topic of what to look for in a basic sewing machine; a Ravelry group (log in required) is also exploring the topic.

Margaret Mary is the most experienced seamstress of all of us Church Ladies. Below follows her advice, which I am sharing in her (extremely busy) stead.

I've owned 2 machines; a Singer I bought in college (fairly basic, steel body, a few decorative stitches, all mechanical - no computerized features, automatic buttonhole attachment), and a Viking/Husqvarna I got about 15 years ago (more decorative stitches and auto buttonholes, computerized features, I can get tons of add-ons and bought a foot that does quilting through multiple layers).

I've sewn miles of fabric, literally, and would feel perfectly comfortable with a machine that had only the following features:
  • Stitches - straight stitch (obviously), zig-zag, and running zig-zag for knits. Everything else is extra. I use my decorative stitches on little girl dresses, etc. But none of them are on the essentials list.
  • Buttonholes - The most basic machines have buttonhole features that will make the stitches but not stop automatically at a certain length. This is workable, but not nearly as convenient as a machine that will automatically make ten identical 16 centimeter buttonholes on the front of your blouse. If there's a choice, go with something that does buttonholes automatically.
  • Construction - It is almost impossible to find a metal sewing machine anymore. This was a big surprise to me when I was shopping, but C' est la Vie. I used to like using my magnetic seam gauge and pincushion stuck on the machine, but I'm not so old that I can't adapt.
  • Computerized - again, not essential, but easy to use. When my old, mechanical one was not working quite right, my husband or I could take it apart to various degrees and make it better. That's not as possible with the new one.
  • Case - get a case for storage unless you have a dedicated table for the thing or never plan to use it away from home. It's likely the case will not be included in the price of your machine.
  • Find out where you can have it serviced. You'll want it to be someplace local and fairly convenient. Repairs on any model are outrageously priced, so look into a warranty of some kind, but don't overpay for one. Really, unless you get a lemon, machines need few repairs. I had to replace a presser foot on my Singer and the arm that lifts my Viking broke once. Those are the only repairs I've ever had in a lot of years, but the prices are ridiculous.
What about you? What do you like about your machine? Do you have a great story about how you acquired it?
Image source

Tuesday, May 18, 2010

Hint of the Day

It's easy enough to drop down to fix a stitch that's knit instead of purled. And this technique is great for fixing cables that are crossed the wrong way, but when you have to drop down more than a few rows, and with a six or eight stitch cable, how do you make sure you pick up all the ladders in the right order?

Reach in your medicine cabinet for your comb. The wider the teeth, the better. Start unraveling the cable stitches one row at a time, placing the big loop on to the comb teeth, starting from the outside in. Voila! All your ladders are in order and not tangled. Now cross your cable in the right direction, and insert the first (and smallest) ladder into the stitches. Then pick up all the stitches as you would an individual using a crochet hook and the remaining ladders/loops.

This just in from Ravelry: another use for your slow cooker.

Saturday, May 15, 2010

Ordination Sweaters


Ordination season is upon us. And while there are many options (see our "Gifts for Priests" posts), I'm currently exercising a preferential option for knitting sweaters.

I'm hard at work on the Twisted Pine Pullover for Deacon Pat, who will be Father Pat in a few short weeks. I had expected to fly through this sweater- after knitting a DK Aran sweater for my husband for Christmas, I thought a simple cabled worsted/bulky weight would be done in no time. The main thing that's slowing me down? The dark yarn.

Will I finish in time? I hope so! But as I knit to the finish line... er neckband, I have a few do's and don'ts to share.

Do
1. Pick a pattern commensurate with your skill level and the time you have available.
Here are a list of some nice patterns that are free or available from your public library:
Ben
Leo
85-6 Pullover (a Tree of Life-esque motif)
Cobblestone Pullover
Durrow
Jamesey
January Aran Sweater (EZ)
#17 Man's Cable Sweater
Smokin'

Also, substituting a simple knit and purl pattern can make a stockinette pattern look more elegant. Just make sure you get the same gauge.

2. Knit the front first. Push comes to shove, you can knit the back and sleeves in stockinette.

3. Consider a vest instead, especially if it's for a warm climate. Vests have less positive ease than a sweater, so it will knit up faster.

4. Pick a washing machine friendly yarn. Sensitive to wool, Berroco Comfort has been my go to yarn. I quote Therese, "This is acrylic?" The heather line is especially nice.

5. Use needles that contrast with the yarn for maximum visibility.

Don't
1. Knit in black, navy, dark green, etc unless you have a lot of sunny daylight knitting time. Burgundy, slate blue, oatmeal, and gray are all nice masculine colors that are much easier on the eyes and brain.

2. Start too late. It's better for a project to be gift wrapped in the closet for months than to be weaving in ends on the way to the cathedral.

3. Make it too hard on yourself. If you have a group of Church Ladies that knits similarly enough, farm out the pieces. Just make sure the yarn is all in the same dye-lot and matching parts are blocked to the same size.

Do you have any other tricks of the trade or patterns to share?

Image source

Tuesday, May 4, 2010

Vintage Needlework Videos

I thought our viewers might enjoy these two 1930's short subjects, both involving ladies and their needlework.

The first is an instructional video on tunisian crochet (can you imagine running across something like that in the theatre today?), and the second features a stage actress, Miss Whybrew, and the copious amounts of knitting she does off- (and on-!) stage.

Sunday, May 2, 2010

Lucy Learns to Sew: Project 3

Pattern:
None, really

Fabric:
XL Skirt ($4.50, Goodwill)
Small amount of navy batiste (sunk cost from another project)

Other Notions:

Zipper (re-used original)
Interfacing (.50)
Hook and Eye: (1 @ $1.29 a dozen)
Negligible amount of white and navy thread
Sash from summer dressing gown (free)

Total Cost: $5.13
Time: About 2 hours
New Sewing Techniques: adaptive reuse

I found a brand new Coldwater Creek skirt at the thrift store awhile ago. It was made from an excellent quality fabric, but was too wide at the waist and too long.


I originally planned to turn this skirt into a tiered skirt, but after I trimmed off the beads and cut the skirt yoke pieces, I realized there was more fabric than I needed for a skirt and a lot of nicely finished seams. As an architect, I have long been intrigued by adaptive reuse. I saw the potential for a maxi dress- perfect for summer road trips and barbecues.

I turned the yoke upside down (the hips now became the bust). I cut out about 1/4 of the remaining fabric divided evenly over one seam, then gathered the remainder gently. I liked the current hem length, but needed a few extra inches at the top, so I raided the scrap bag for some navy fabric, echoing the skirt's original waistband. I folded it double and reinforced it with interfacing in between the fabric layers. I attached the band to the bodice and the assembly to the skirt, and worked in a few back darts. I sewed the new side seam, replaced the zipper, then made straps from the surplus skirt fabric. A few sash loops, a hook and eye, and this project was ready to go!

If you are starting without a pattern, this helpful tutorial demonstrates how to turn an ill-fitting skirt into a dress; the book New to Old is also full of adaptive reuse ideas with minimal sewing- always key in my book!

Tuesday, February 2, 2010

A Reader Asks:

  1. How tall should the monogram be for a man's handkerchief?
  2. What stitch do you recommend for forming the monogram? The monograms in today's picture look like machine embroidery.
  3. Any recommendation for fonts and colors?
My suggestions:
  1. The height can vary. I guess I'd go with something about 1/2-5/8". That would depend on your overall design though. The round design in the photo is bigger. I'm inclined to smaller monograms, but I've seen purchased handkerchiefs with a single initial that's almost an inch high.
  2. Those pictured are definitely machine embroidered. For hand embroidery, I'd recommend using a satin stitch with a single strand of floss for most monograms. You might want to use a back stitch for very narrow areas and thin lines. I like to use an embroidery hoop to keep everything stretched tight; it always gets pucker-y for me if I don't.
  3. Colors: navy, grey, maroon, black, and cadet blue are all classics. If I were making one for my son, however, I would be tempted to use bright red. (He's kind of a flashy dresser. :-) Fonts: I worked out a few examples below. (Click on the image to make it bigger.) If the directions aren't clear, just put your questions in the comment box. I used Microsoft Publisher for the WordArt features to make the funky shapes. You might be able to do it on MS Word also, but I'm not as familiar with that program.


Monday, January 25, 2010

More veil ideas

There are lots of beautiful veils available (most with copyrighted photos so I won't use them here), but you can apply the principles from my post earlier this week to create many of them at home.

The foundation fabric most commonly used for veils is tulle, a fine netting typically made of silk or nylon. Nylon tulle is very inexpensive and comes in a variety of widths, up to 108 inches. Because it will not ravel when cut, it's perfect for this use.

This one starts with 72" or 108" width tulle. Cut a rectangle the length you want for your finished veil and then generously round the bottom. Hand sew the trim onto it according to yesterday's directions. To finish it, gather the top edge with a running stitch and sew it to a plastic comb (or two).

This one is a large oval of tulle with lace sewn around the perimeter. (Probably 72" width, but measure from one elbow, over your head to the other elbow for an accurate diameter.) It's worn just draped over her head, without a comb in photo 2. To wear it like photo 1, hand sew it to a plastic comb under the lace at the center top. To reinforce the lace, you could sew a piece of satin ribbon between the comb and the underside of the veil.

Instead of a lace edge, this one has a narrow, satin ribbon machine sewn about 1/2" from the edge of the tulle. After you attach the ribbon, trim the extra tulle edge away and attach it to a comb, headband, wreath, or hair clip.

This edge is finished with a narrow, satin rattail cord. Simply lay the cord on top of your tulle, about 1/2 inch from the cut edge, and use a zig-zag stitch and clear nylon thread or matching cotton/poly or rayon thread made for lightweight fabrics. Your stitch width should be wide enough that the zig-zag goes on either side of the cord, but not through it. Carefully cut the extra tulle off the edge without cutting through the stitching, and finish the veil with some kind of comb, etc.

This helpful site gives measurement suggestions, but there are also patterns with detailed instructions available.

Making a veil can be a very satisfying project. Besides the potential to save a lot of money, even a novice seamstress can get beautiful results.

Monday, January 18, 2010

Some stained glass for your domestic church


These crochet blankets are both contenders in Ravelry's Bobby awards.

Top: Cathedral Rose Window (crocheted by JulieAnny)
Bottom: Stained Glass Blanket (crocheted by MyDailyFiber)

Thursday, December 17, 2009

Having your cookie and knitting it too

A recent Christmas hamper contained a cylindrical metal tin of Pirouline (rolled wafer cookies). After the cookies (all too quickly) finished, I re-purposed the container for storing my knitting supplies.

This particular container was 6" tall, making it ideal for shorter dpns. I've seen taller containers for other baked goods, which would be handy for longer needles, dpn or straight.

Depending on what implements you own, you might
-Store all your dpns, tied together in size batches with ribbons and tags
-Organize your tools by size, e.g, all your 4 mm circs, dpns, and crochet hooks. Place a sticker with the size on the lid.

I used left-over adhesive shelf paper. Wallpaper or other sturdy paper would work if you don't mind the mess of glue. Voila! You now have a storage container that coordinates with your decor.

Monday, December 7, 2009

A stitch in time...


"Run the heels of stockings faithfully; and mend thin places as well as holes. 'A stitch in time saves nine.'" [The American Frugal Housewife, 1829]

When I got married, I was shocked to learn my husband threw away socks once they got holes in them. There's no need! Check out this handy tutorial on sock darning instead, and stocking darning, for your own leg-wear.

Image Source: Boursse, Dutch Interior with Woman Sewing

Friday, December 4, 2009

Thrifty Gifts - Felted Slippers


While I'm on the subject, felted (technically fulled, in this case) slippers are also perfect for last-minute Christmas gifts, as they work up very quickly, and all but the most egregious mistakes are covered up by the felting process. An average-sized pair of women's ballet or Mary Jane-style slippers can use less than 100-grams of wool (make sure it's 100% non-washable wool!), making these a very thrifty project as well, especially if you use one of the 40-50% coupons from the larger craft stores.

There are many free patterns available on the internet (I found 68 on Ravelry; 10 for crochet and 58 knitting). If you're willing to do a little math, this ballet/Mary Jane pattern is completely customizable. If, like me, you're too lazy to make and felt a swatch before doing the calculations, I've found that for knitting, holding worsted-weight yarn doubled (you can triple it for the soles, if they're worked separately), and knitting at a gauge of about 2 st/in (I use US size 15 needles) makes a fabric that felts readily and to a good thickness, but you'll have to check on the felting progress often to make sure you don't end up with slippers that are too small! (Crocheters will have to Google around for their own advice, I'm afraid, as I'm less experienced at such.)

Find out the shoe size of the giftee as surreptitiously as possible, and use a shoe size chart to determine the finished length in inches. Pre-felting, the slipper should be 130-150% of this size. I was able to finish the knitting for a pair of slippers for myself in less than an evening, because of the large gauge. It's a bit easier to double-strand the yarn if you have two balls to work from, but not really necessary. Sew the parts together, if the pattern requires it, and tie them into an old pillowcase. I recommend tying it shut with a piece of yarn, in a bow, so that you can undo the knot when wet; tying the pillowcase itself into a knot never seems to stay shut.

Throw it into the washing machine with some old towels or jeans, add a little detergent, and set your machine for the lowest water level, the hottest temperature, and the highest agitation settings it has. After 5 minutes of agitation or so, check the progress. It's possible that the slippers will have actually grown, because of the hot water, but don't worry; they'll start shrinking up soon. Keep checking back at least every 5 minutes, setting the dial back to the beginning of the wash cycle if necessary, until the slippers reach the desired size (I usually shoot for 1/2" or so smaller, as felt tends to stretch a bit as it is worn). At this point, rinse them out, roll them up in an old towel, and squeeze out the excess water (some people use the spin cycle on their washer for this, but I'm not quite that intrepid just yet). Wet felt is very malleable, so this is the time to stretch and squeeze the slippers into the desired shape, stuffing them with plastic bags to hold the toes and heels in place, if desired (I sometimes use cans to shape the heels). Find a sunny spot, and let them dry for 2-3 days. This process can be speeded up by setting them on a drying rack or other ventilated surface, and/or pointing a fan in their direction.

Once dry, I recommend using a bottle of puffy paint ($1.50) to paint a design of some sort on the soles of the slippers and give them a bit of traction, especially if they will be used by children. This could be as simple or elaborate as you like, and could include the wearer's monogram, or even a personal message. Optional additions would be a piece of grosgrain ribbon sewn around the inside edge to help prevent the aforementioned stretching, and embellishments such as buttons, bows, or appliqués.

Expenses:
  • Yarn: 1-100 gr skein of 100% wool yarn $2.50-$3 (on sale/with a coupon; $6-8 is a typical full price)
  • Puffy paint: 1 bottle (will cover multiple pairs) $1.50
Bonus ideas: Other great felted gifts include bags (481 free patterns on Ravelry), handle covers for cast-iron skillets, and oven mitts (for this one, make sure you felt it nice and thick, and I'd recommend using scissors or an old razor to trim some of the excess fuzz).

Wednesday, December 2, 2009

Thrifty Gifts - Felted Soap


I just recieved my Anthropologie Christmas catalog in the mail today, and there on the cover was an apron full of these darling felted soaps. Now, of course, a $14 bar of soap doesn't really qualify as thrifty, but you can easily make your own luxury gift with around 1/2 oz of wool roving and a bar of your favorite soap. My Personal Favorite inexpensive soap is Yardley Lavender, but I'm sure many of you have your own. Remember, looks don't count for this project, since no one will ever see the soap but you!

Instructions for felting around the soap can be found here, and I would only add that putting the wrapped soap inside an old nylon stocking while felting will make the process rather less clumsy, and probably help it to go faster by adding a bit of scrubbing action.

If you prefer working with yarn to roving, knit a Wee Little Soap Sweater instead (pattern found here, or devise your own), and let the recipient do the felting as they use it. Add a darling little tag (below) with the scent listed, and perhaps knit a cotton face cloth to complete the gift.

Materials:
  • 1 bar of the soap of your choice: $2-3 on up
  • 1/2 oz of wool roving: $3 or so, depending upon how it's packaged